


Rudder Servo Repair
|
Depending on where you sail (fresh or saltwater) you may run into problems with your servos. The primary problem is that water gets into the servos and can cause a number of problems; the most common is the fouling of the potentiometer witch can be seen as a twitching of the servo or a failure of the servo all together. Without getting too technical, the potentiometer is the device directly connected to the output arm of the servo that tells the servo where the arm is, compared to where the transmitter is telling it to be. If this device becomes fouled and communication breaks down or becomes intermittent, then the servo bounces back and fourth trying to agree with the transmitter, or it stops completely. BEFORE you try to repair your servo, make sure you have made every effort to check that the problem you are having is not one of the following:
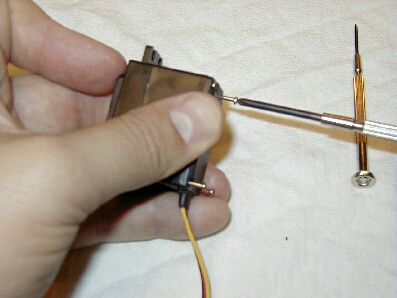
If after checking the above and you are still having problems, try your local hobby shop. If you are still out of luck only then try the following. This technique is my solution and is not to be rushed. If done incorrectly you can totally destroy your servo, so proceed at you own risk and TAKE YOUR TIME.... |
 |
 |
 |
 |
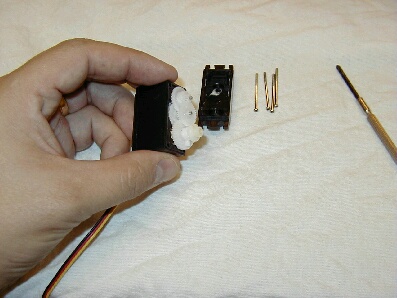
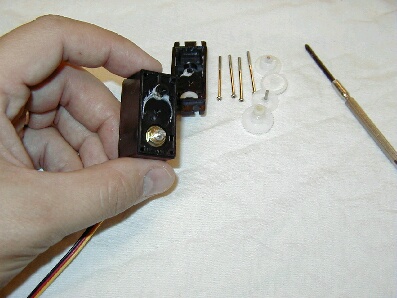
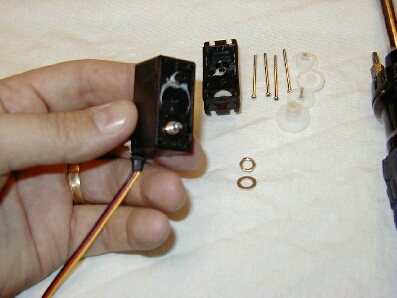
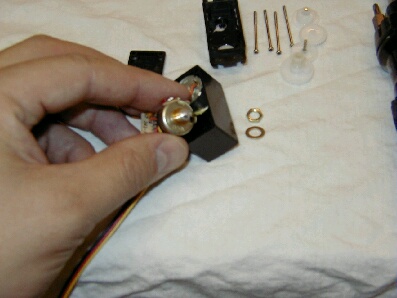
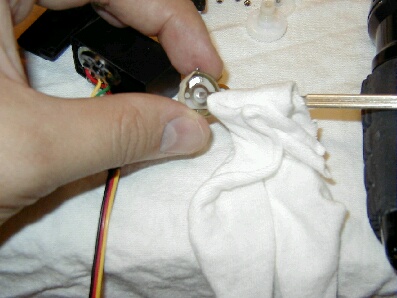
| 1. Remove the bottom case screws | 2. Remove the top case cover | 3. Remove the gears and shafts - Take note of the placement of each gear. This exposes the Pot nut. | 4. Remove the potentiometer nut and washer |
 |
 |
 |
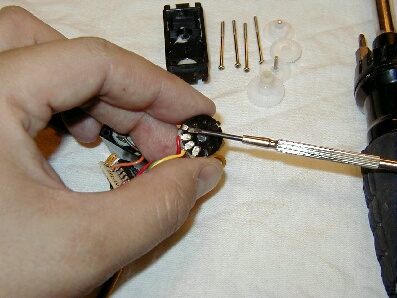 |
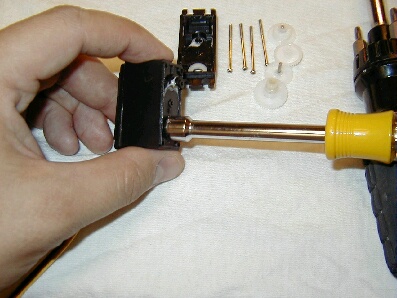
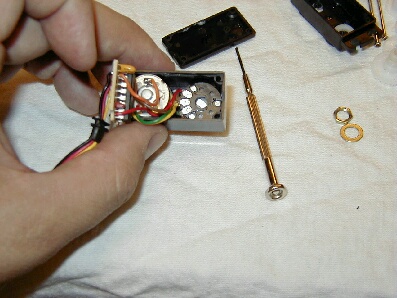
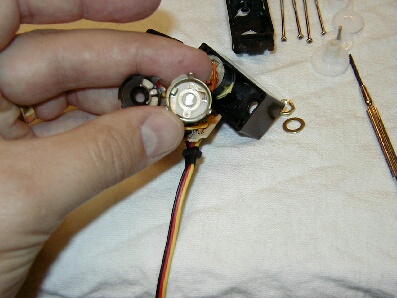
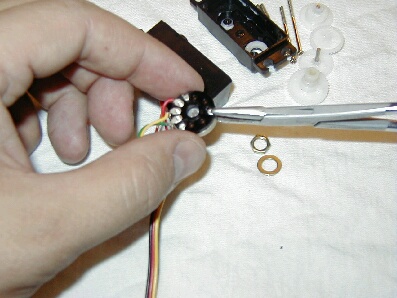
| 5. Gently loosen the circuit board and move out of the way exposing the pot. Take note of the orientation of the pot. | 6. Press the shaft (top) of the pot. down, forcing the pot into the case. | 7. Carefully lift the pot. out of the case. Mark the pot. top and bottom for orientation. | 8. There are three "hold down" tabs, carefully pry each tab up. |
 |
 |
 |
 |
| 9. Separate the two halves of the Pot. exposing the contact brushes | 10. Using a soft cloth lightly wipe the surface of the disk. Do not touch the brushes. | 11. Put the Pot back together checking the orientation marks and bend the three tabs back into place | 12. Insert the pot back into the case, reset the orientation (see#5) and insert the washer and tighten down the pot nut. |
 |
 |
 |
 |
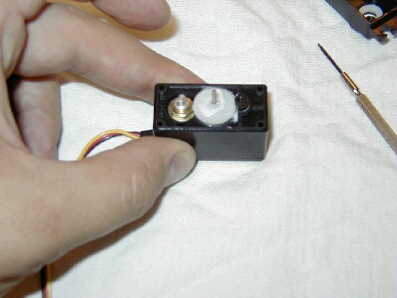
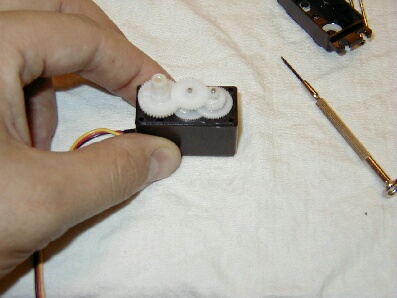
| 13. Carefully reinsert the circuit board, align the servo wires and reseat the case bottom. | 14. Turn the case upright | 15. Carefully reinstall the gears making sure they are seated and turn freely. | 16. Screw in the bottom case screws. |
Plug the servo back into your receiver and give it a try.
Not all problems with servos can be fixed with this method but I have found that it has cleared up a number of twitchy servos.
If all else fails give your hobby shop a call and purchase a new servo. I hope this page was of some help.
